Sika AnchorFix®-1
Fast-curing polyester anchoring adhesive
Sika AnchorFix®-1 is a solvent-free, styrene-free, two-part polyester anchoring adhesive. It is used for anchoring threaded rods in uncracked, dry or damp concrete, and hollow or solid masonry.
- Fast curing
- Standard sealant dispensers can be used
- Can be applied at low temperatures
- Suitable for use in dry, wet, and water-filled holes
- Very good load capacity
- ETA to EAD 330499-01-0601 for anchoring in uncracked concrete
- ETA to ETAG 029 for anchoring in solid and hollow masonry
- ETA based on working life of 50 years or 100 years
- Thixotropic: non-sag in vertical and overhead applications
- Styrene-free
- Low wastage
- Low odour
Overview
Usage
Sika AnchorFix®-1 is used as a fast-curing anchoring adhesive for the following substrates:- Concrete
- Hollow and solid masonry
- Hard natural stone
- Solid rock
- Threaded rods
- Reinforcing steel
- Bolts and special fastening systems
- The Product may only be used by experienced professionals.
Advantages
- Fast curing
- Standard sealant dispensers can be used
- Can be applied at low temperatures
- Suitable for use in dry, wet, and water-filled holes
- Very good load capacity
- ETA to EAD 330499-01-0601 for anchoring in uncracked concrete
- ETA to ETAG 029 for anchoring in solid and hollow masonry
- ETA based on working life of 50 years or 100 years
- Thixotropic: non-sag in vertical and overhead applications
- Styrene-free
- Low wastage
- Low odour
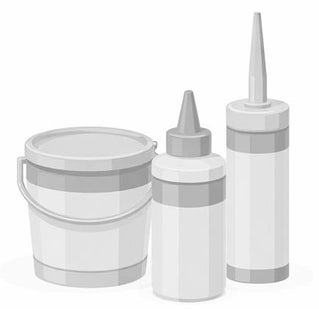
Packaging
150 ml standard cartridge | 20 cartridges per box 75 boxes per pallet |
300 ml standard cartridge | 12 cartridges per box 75 boxes per pallet |
550 ml standard cartridge | 12 cartridges per box 50 boxes per pallet |
Refer to the current price list for available packaging variations.
Colour
Colour of the cured Product: concrete | Colour of the cured Product: stone | |
Part A | white | white |
Part B | black | salmon |
Part A+B | light grey | beige |
Product Details
SUSTAINABILITY
LEED v2009 IEQc 4.1 Sika AnchorFix®-1
APPROVALS / CERTIFICATES
CE marking and declaration of performance based on European Technical Assessment ETA-13/0720. ETA issued on the basis of EAD 330499-01-0601 Bonded fasteners for use in concrete.
CE marking and declaration of performance based on European Technical Assessment ETA 17/0179 Injection anchors for use in masonry. ETA issued on the basis of ETAG 029 Metal injection anchors for use in Masonry.
Shelf life
12 months from date of production
Storage conditions
The Product must be stored in original, unopened and undamaged sealed packaging in dry conditions at temperatures between +5 °C and +25 °C. Protect the Product from direct sunlight.
Refer to the current Safety Data Sheet for information on safe handling and storage.
Density
~1.63 kg/L (component A+B mixed) | (ISO 1183-1) |
Compressive strength
Cured 7 days at +20 °C | 60 N/mm2 |
Modulus of elasticity in compression
Cured 7 days at +20 °C | 3500 N/mm2 |
Tensile strength in flexure
Cured 7 days at +20 °C | 28 N/mm2 |
Tensile strength
Cured 7 days at +20 °C | 12 N/mm2 |
Service temperature
Time | Minimum | Maximum |
Long term | -40 °C | +50 °C |
Short term (up to 2 hours) | - | +80 °C |
Application
Mixing ratio
Part A : Part B | 10 : 1 by volume |
Layer thickness
Maximum | 3 mm |
Sag flow
Non-sag, even overhead
Product temperature
Maximum | +40 °C |
Minimum | +5 °C |
Ambient air temperature
Maximum | +40 °C |
Minimum | -10 °C |
Dew point
The substrate temperature must be at least +3 °C above dew point to reduce the risk of condensation decreasing adhesion.
Substrate temperature
Maximum | +40 °C |
Minimum | -10 °C |
Curing time
Temperature | Open time - Tgel | Curing time - Tcur |
+30 °C | 4 minutes | 35 minutes |
+25 °C to +30 °C | 4 minutes | 40 minutes |
+20 °C to +25 °C | 5 minutes | 50 minutes |
+10 °C to +20 °C | 6 minutes | 85 minutes |
+5 °C to +10 °C | 10 minutes | 145 minutes |
+5 °C Minimum cartridge temperature: +5 °C | 18 minutes | 145 minutes |
-10 °C This application is not covered by the scope of the product ETA or any other approval. | 30 minutes | 24 hours |
SUBSTRATE PREPARATION
Mortar and concrete must be older than 28 days.
Verify the substrate strength (concrete, masonry, natural stone). Perform pull-out tests if the substrate strength is unknown.
Make sure that the anchor hole is clean, dry, free from oil and grease. Remove loose particles from the anchor hole.
Clean threaded rods and reinforcement bars thoroughly. Remove oil, grease or any other substances and particles such as dirt.
MIXING
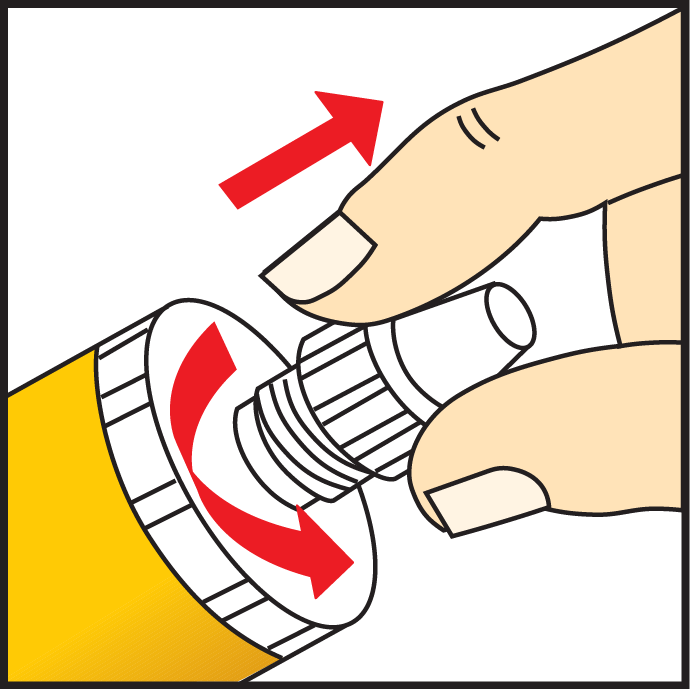
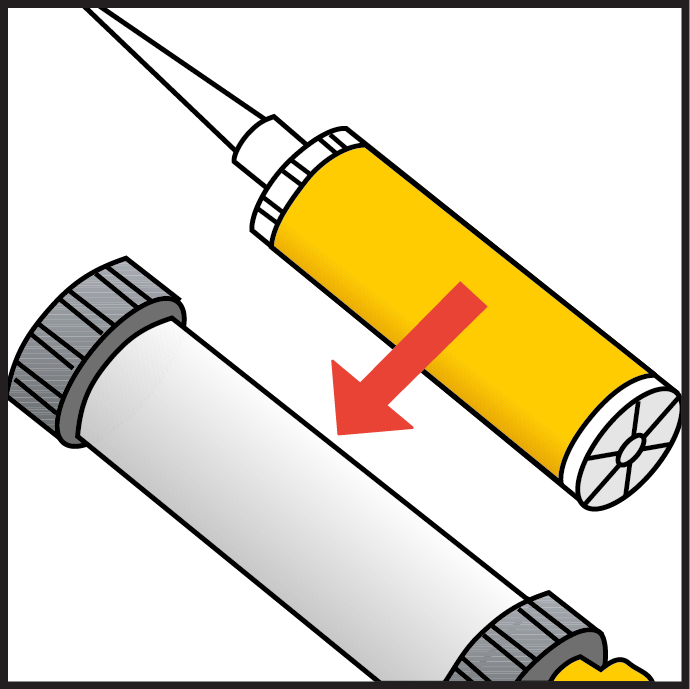
GETTING THE CARTRIDGE READY
1. Unscrew the cap.
|
|
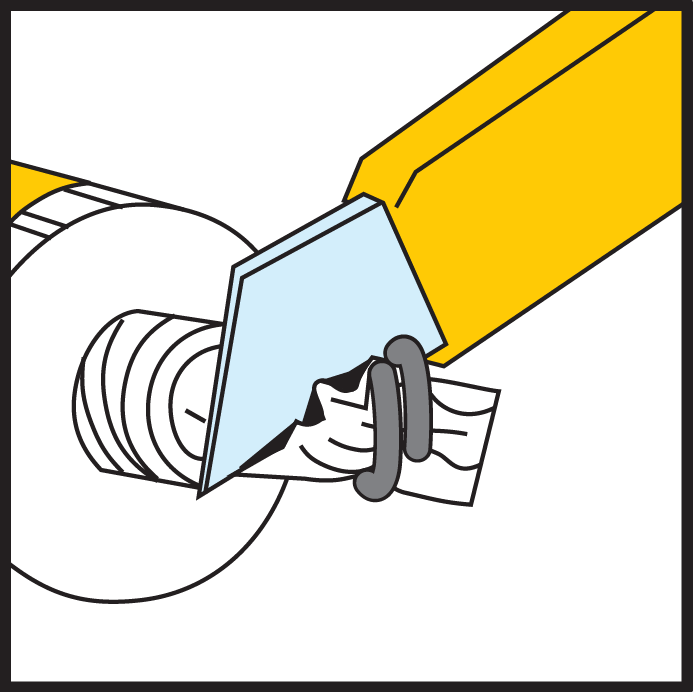
2. Cut the film if needed.
|
|
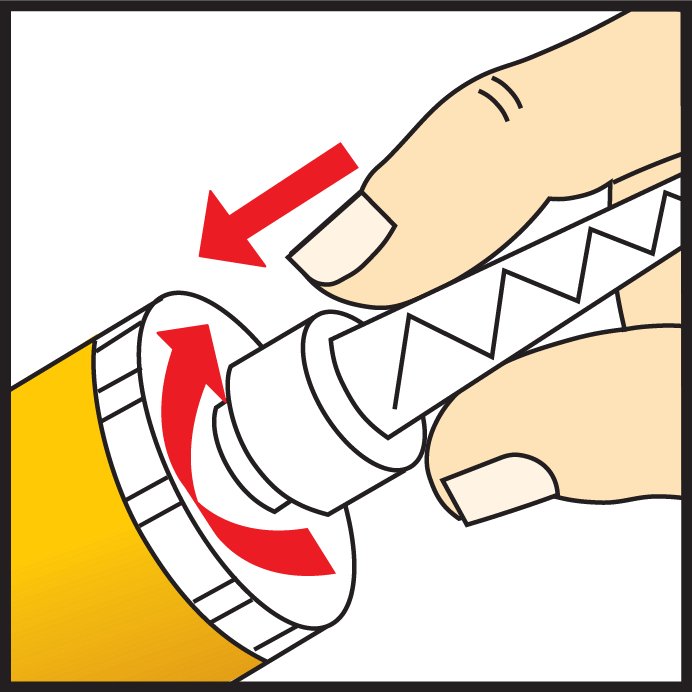
3. Screw on the static mixer.
|
|
4. Place the cartridge into the dispenser and start application.
|
|
When the work is interrupted the static mixer can remain on the cartridge after the gun pressure has been relieved.
If the resin has hardened in the nozzle when work is resumed, a new nozzle must be attached.
APPLICATION
Test if the Product is suitable for the substrate
Note: Due to the variety of possible substrates, the Product's suitability for the substrate must be confirmed before application, particularly in terms of desired bond strength, composition, porosity, potential surface staining or discolouration.
- Test the Product's suitability in a sample area.
ANCHORS IN SOLID MASONRY OR CONCRETE
1. IMPORTANT Make sure that the drill hole diameter is in accordance with the anchor size. Drill a hole with an electric drill to the diameter and depth specified in the Technical Documentation listed in the section Further Information.
|
|

2. IMPORTANT Use oil-free compressors. Clean the drill hole with a blow pump or by compressed air, starting from the bottom of the hole. Note The hole must be cleaned a minimum of two times.
|
|
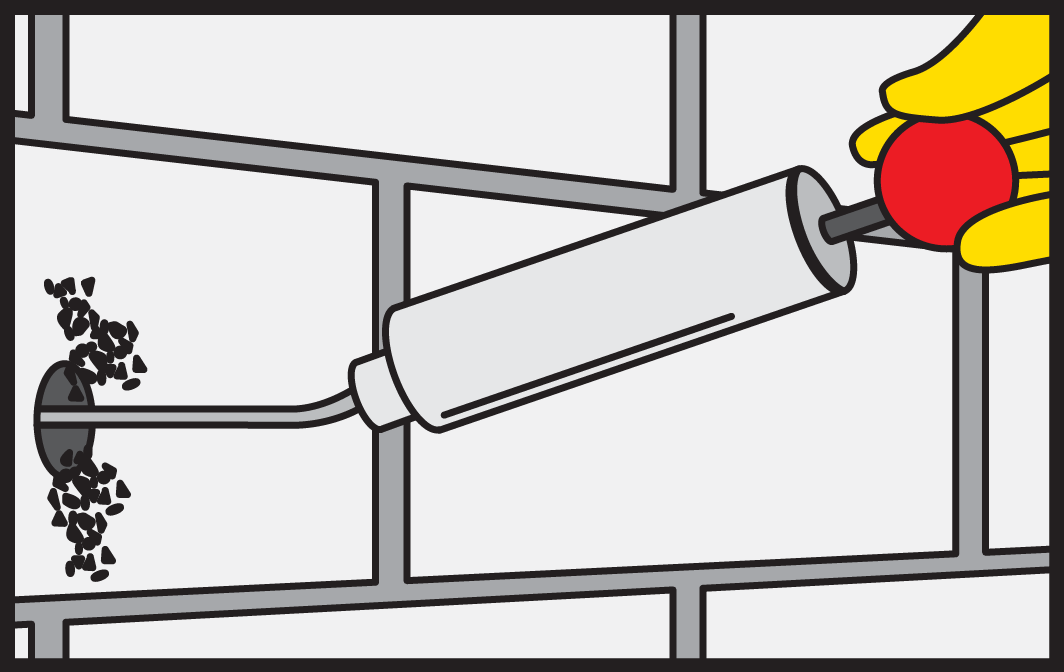
3. Thoroughly clean the drill hole with the hybrid brush. Note The diameter of the brush must be larger than the diameter of the drill hole and the hole must be cleaned a minimum of two times.
|
|

4. IMPORTANT Use oil-free compressors. Clean the drill hole with a blow pump or by compressed air, starting from the bottom of the hole. Note The hole must be cleaned a minimum of two times.
|
|
5. Thoroughly clean the drill hole with the hybrid brush. Note The diameter of the brush must be larger than the diameter of the drill hole and the hole must be cleaned a minimum of two times.
|
|
6. IMPORTANT Use oil-free compressors. Clean the drill hole with a blow pump or by compressed air, starting from the bottom of the hole. Note The hole must be cleaned a minimum of two times.
|
|
7. Pump the Product until both parts come out uniformly. Release the gun pressure and clean the cartridge nozzle with a cloth.
|
|
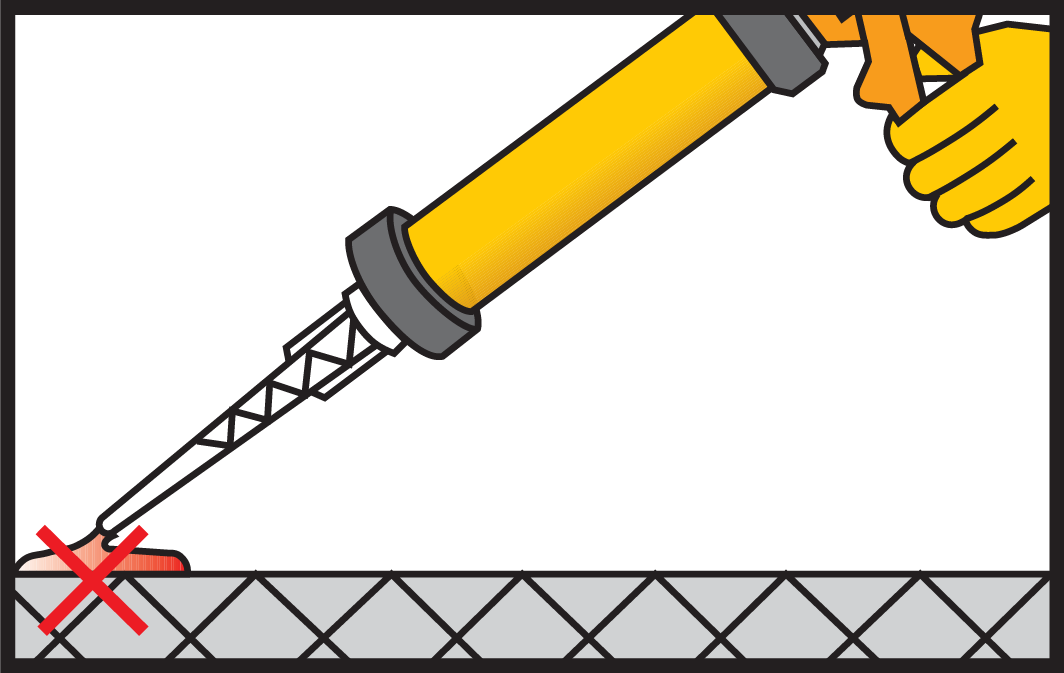
8. IMPORTANT Do not entrap air into the hole. Inject the Product into the hole starting from the bottom while slowly drawing back the static mixer. Note For deep holes extension tubing can be used.
|
|
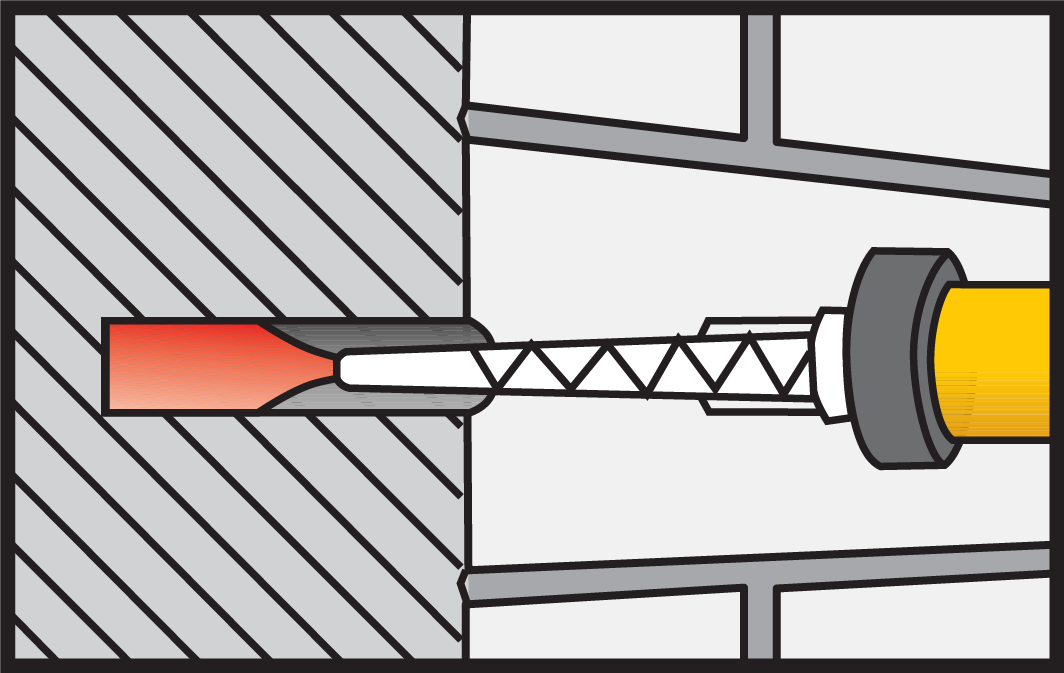
9. IMPORTANT The anchor must be placed within the open time. Insert the anchor with a rotary motion into the filled drill hole. Note Some adhesive must come out of the hole.
|
|
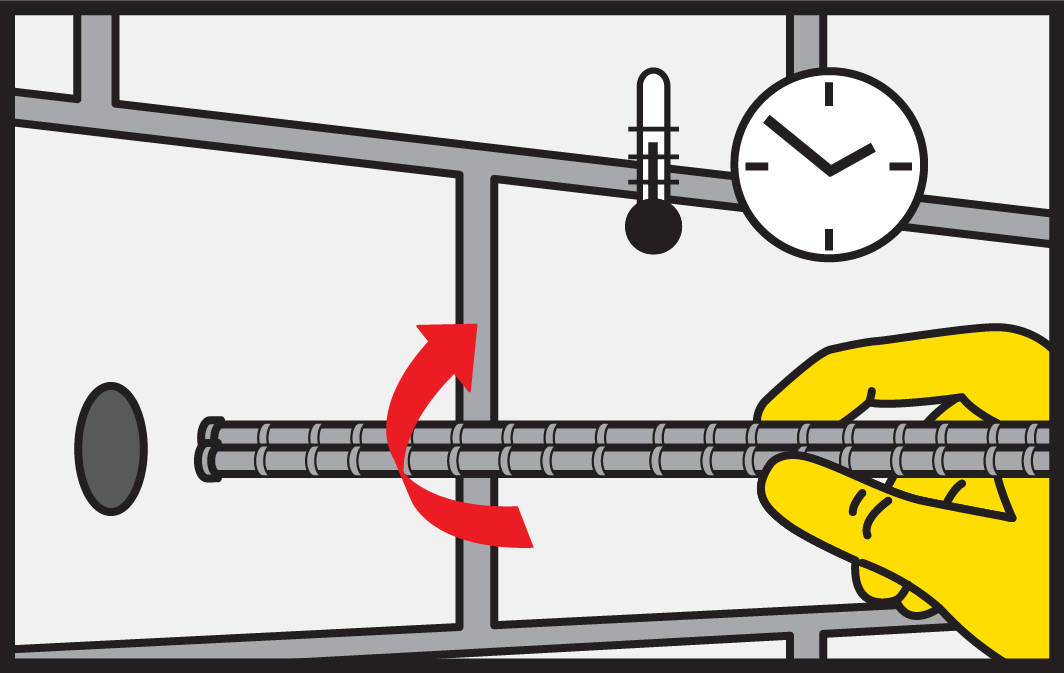
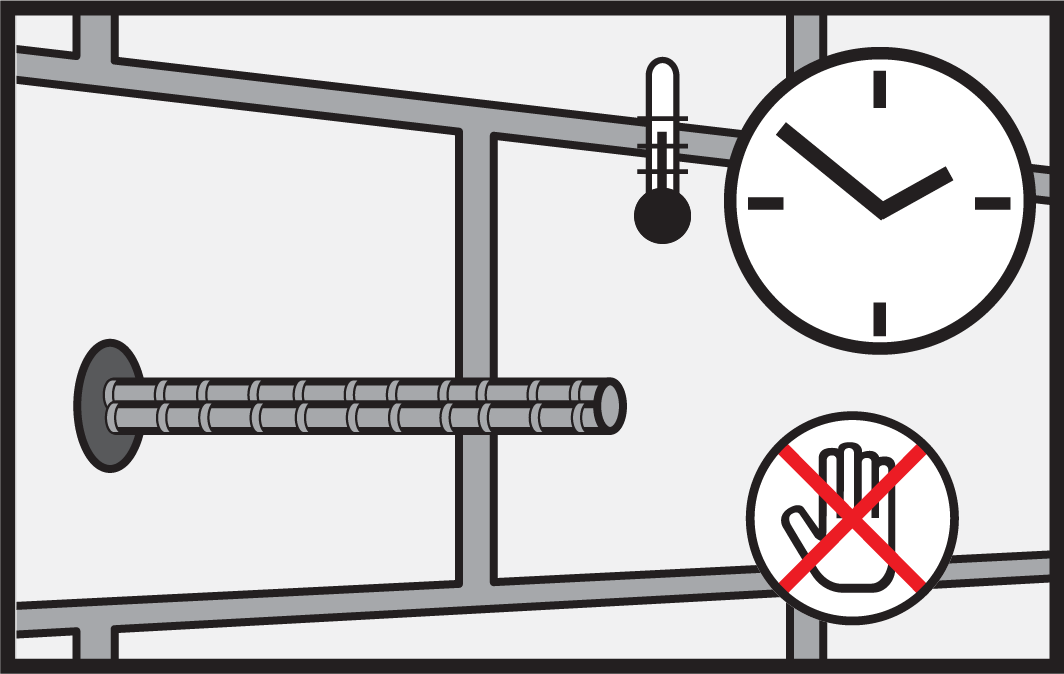
10. Do not load or move the anchor during the hardening time.
|
|
ANCHORS IN HOLLOW BLOCKS
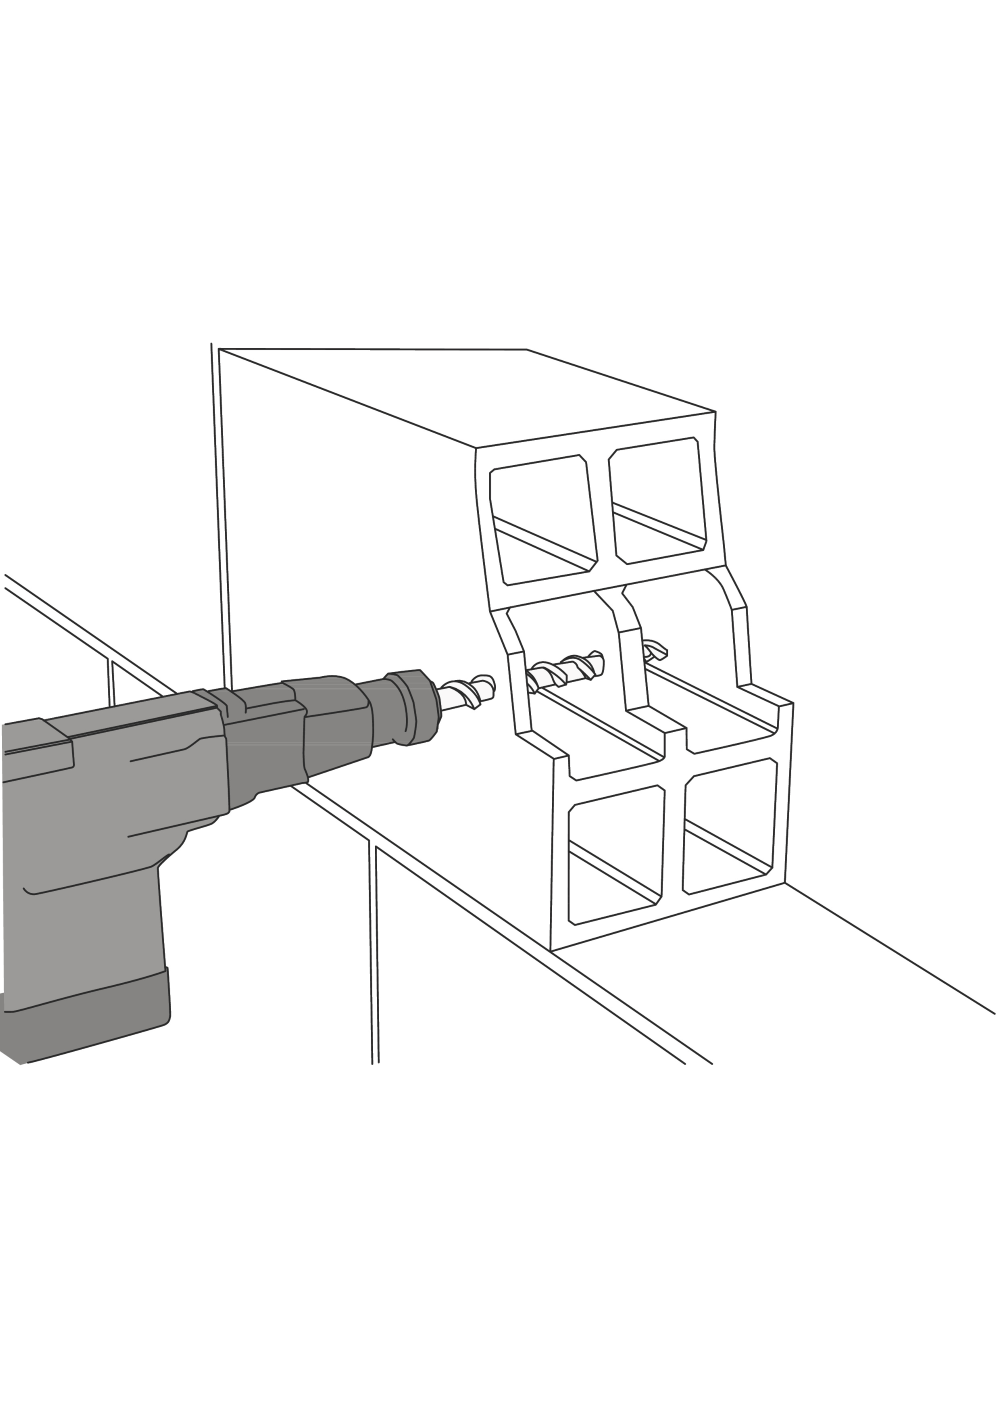
1. IMPORTANT Do not use rotary hammer drills. Drill a hole with an electric drill to the diameter and depth specified in the Technical Documentation listed in the section Further Information. The drill hole diameter must be in accordance with the anchor and the perforated sleeve size.
|
|
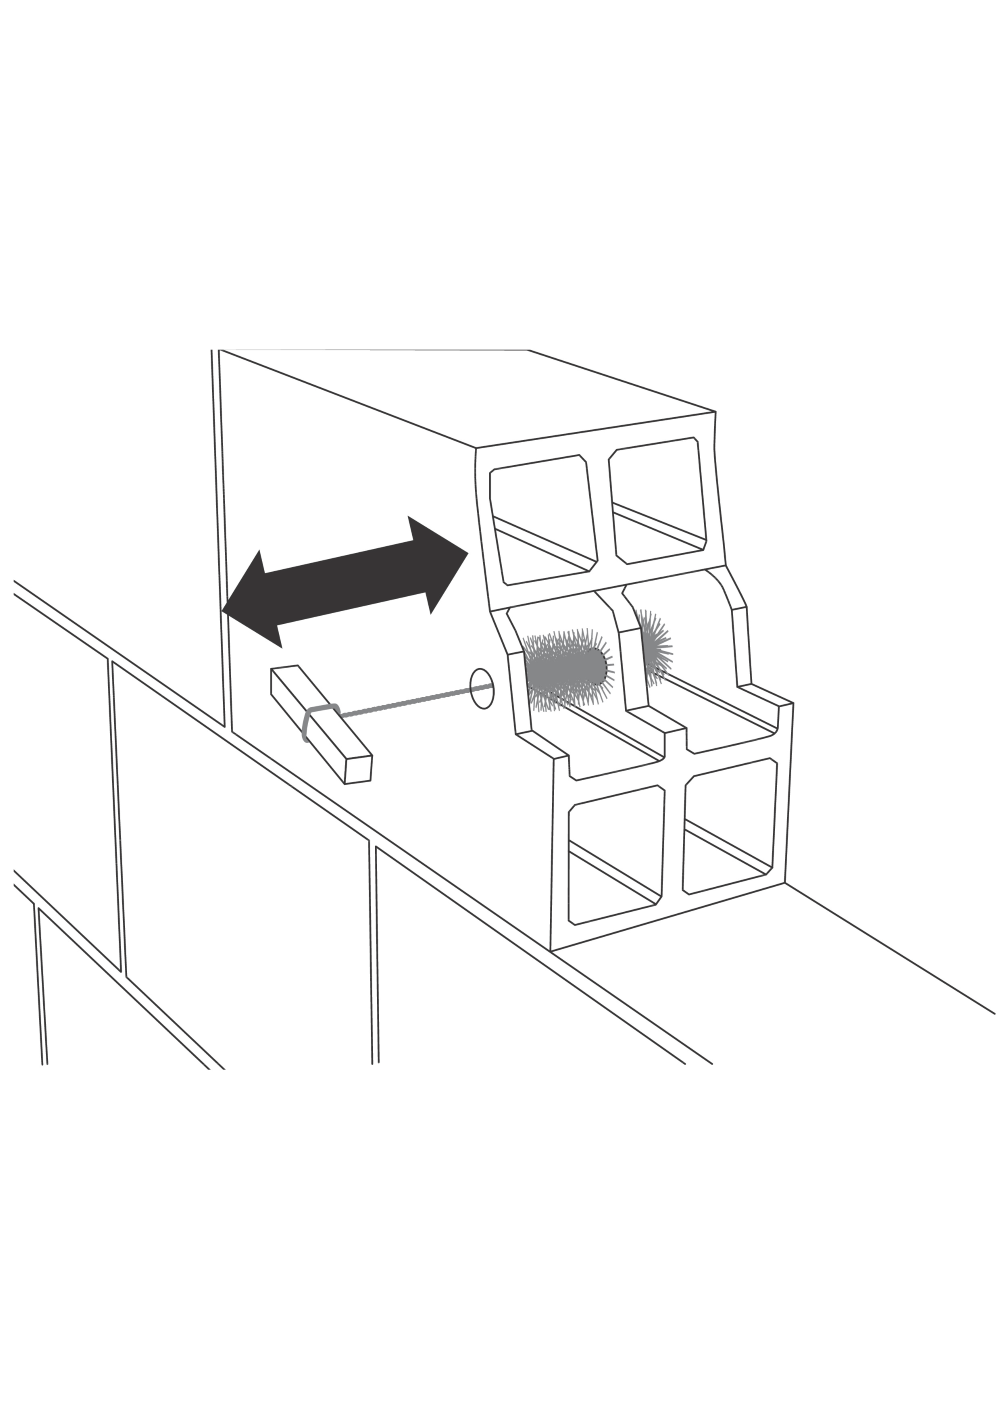
2. Clean, at least once, the drill hole with a hybrid brush. Note The diameter of the brush must be larger than the diameter of the drill hole.
|
|
3. IMPORTANT Use oil free compressors. After cleaning the drill hole with the brush, clean the drill hole each time with a blow pump.
|
|
4. Insert the perforated sleeve completely into the drill hole.
|
|
5. Pump the Product until both parts come out uniformly. Discard this material. Release the gun pressure and clean the cartridge nozzle with a cloth.
|
|
6. IMPORTANT Do not entrap air into the hole. Inject the Product into the perforated sleeve starting from the bottom, while slowly drawing back the static mixer.
|
|
7. Close the cap of the perforated sleeve to prevent adhesive from escaping when inserting the steel rod.
|
|
8. IMPORTANT The anchor must be placed within the open time. Insert the anchor with a rotary motion into the filled perforated sleeve. Use the appropriate steel rod size. Note Some adhesive must come out of the hole.
|
|
9. Do not load or move the anchor during the hardening time.
|
|
CLEANING OF EQUIPMENT
Clean all tools and application equipment with Sika® Colma Cleaner immediately after use. Hardened material can only be removed mechanically.